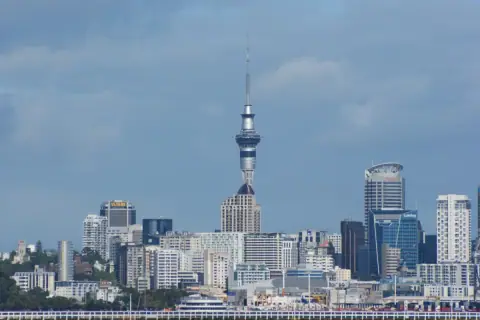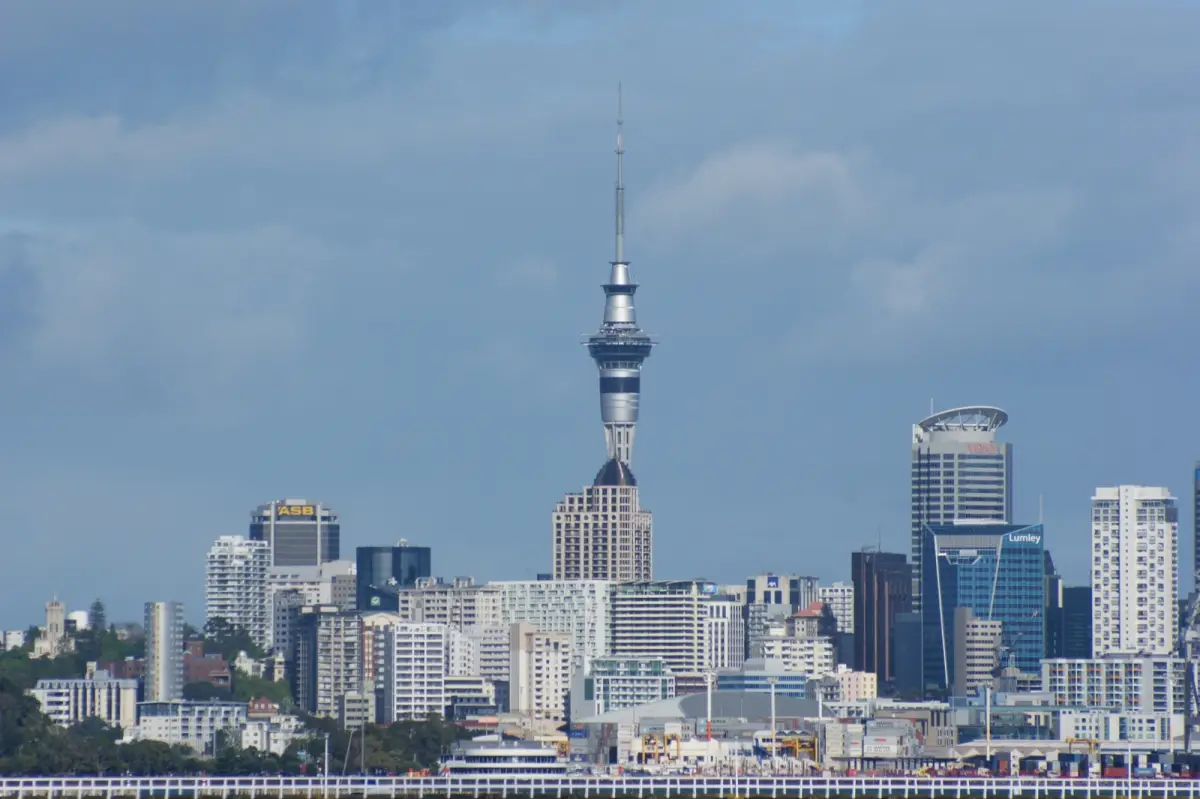
Auckland City Skyline - Flickr - 111 Emergency
Photo: 111 Emergency from New Zealand · CC BY 2.0 · Wikimedia Commons
Free travel itinerary template · 11 days

Auckland & Rotorua 11-Day Itinerary

11 days across Auckland and Rotorua, with a dedicated travel day between bases. Includes Sky Tower and Kuirau Park Thermal Pools. Adjust the suggested visits and transfer breaks to your pace.

Adapted from community travel guides · Researched 2026-11-09Sources & notes

The stops are drawn from the guides below; daily order, times and durations are our suggested adaptation. Available map pins are approximate, not provider-verified; missing coordinates remain unset. Prices are left unknown; check tickets, opening hours and transport before booking.

Route data adapted from Wikivoyage contributors, with our own selection and suggested timing; shared under CC BY-SA 4.0. Source pages link to contributor histories. This is an editorial multi-day schedule; the source community has not rated this itinerary.

  • Check seasonal road and trail access, mountain weather, daylight and any park-entry or shuttle reservations. The plan does not include a booked vehicle, mountain transfer or activity ticket.
  • Stay in Auckland for 5 sightseeing days. Wikivoyage contributors · Auckland/Central: revision 5421277.
  • Stay in Rotorua for 5 sightseeing days. Wikivoyage contributors · Rotorua: revision 5416092.
  • Sight selection is adapted from the linked community guides and previously researched city templates. Suggested time blocks are not confirmed opening hours, reservations or live prices. Adapted Wikivoyage route selections are shared under CC BY-SA 4.0; original photo licenses and credits remain attached.
  • Travel between bases has its own relocation day. Local transfer blocks include a lunch break and require checking against your actual route, transport mode and accommodation. Remote sights may need a driver or an extra travel day.

Auckland & Rotorua itinerary: 11 days at a glance

Every stop and suggested time, day by day

Review the original daily plan before editing below. Times and durations are suggested planning blocks; dining stops are not reservations. Your personal edits appear in the editor and downloads.

Day 1: Auckland: Sky Tower & Auckland Art Gallery

  • Sky Tower · 120 min
  • Lunch break and local transfer · 150 min
  • Auckland Art Gallery · 120 min

Day 2: Auckland: Auckland War Memorial Museum & Auckland Domain

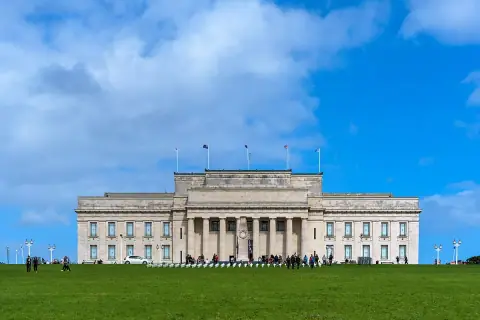
  • Auckland War Memorial Museum · 120 min
  • Lunch break and local transfer · 150 min
  • Auckland Domain · 120 min

Day 3: Auckland: Mount Eden / Maungawhau & Holy Trinity Cathedral

  • Mount Eden / Maungawhau · 120 min
  • Lunch break and local transfer · 150 min
  • Holy Trinity Cathedral · 120 min

Day 4: Auckland: The Lighthouse / Tū Whenua-a-Kura & New Zealand Maritime Museum

  • The Lighthouse / Tū Whenua-a-Kura · 120 min
  • Lunch break and local transfer · 150 min
  • New Zealand Maritime Museum · 120 min

Day 5: Auckland: MOTAT (Museum of Transport and Technology) & St Matthew's Church

  • MOTAT (Museum of Transport and Technology) · 120 min
  • Lunch break and local transfer · 150 min
  • St Matthew's Church · 120 min

Day 6: Auckland → Rotorua: travel and check-in

  • Relocate: Auckland → Rotorua · 600 min

Day 7: Rotorua: Kuirau Park Thermal Pools & Whakarewarewa Thermal Village

  • Kuirau Park Thermal Pools · 120 min
  • Lunch break and local transfer · 150 min
  • Whakarewarewa Thermal Village · 120 min

Day 8: Rotorua: Te Puia & Waimangu Volcanic Valley

  • Te Puia · 120 min
  • Lunch break and local transfer · 150 min
  • Waimangu Volcanic Valley · 120 min

Day 9: Rotorua: Redwoods – Whakarewarewa Forest & Wai-O-Tapu Thermal Wonderland

  • Redwoods – Whakarewarewa Forest · 120 min
  • Lunch break and local transfer · 150 min
  • Wai-O-Tapu Thermal Wonderland · 120 min

Day 10: Rotorua: Bibleworld Museum & Discovery Centre & Buried Village

  • Bibleworld Museum & Discovery Centre · 120 min
  • Lunch break and local transfer · 150 min
  • Buried Village · 120 min

Day 11: Rotorua: Agrodome & aMaze Me

  • Agrodome · 120 min
  • Lunch break and local transfer · 150 min
  • aMaze Me · 120 min

Download this itinerary

Free with a free account
Customise right here: move, duplicate, add or delete days and activities, then download.
Day 1
  • 09:30120m
    corner Victoria and Federal StsMap

    Suggested visit block; confirm current access, tickets, closures and the entrance before travelling. Approximate map pin from a community guide; confirm the entrance. Source: https://en.wikivoyage.org/wiki/Auckland/Central (revision 5421277). Selection and timing adapted from the credited guide; community route data retains CC BY-SA 4.0 attribution.

  • 12:00150m
    AucklandMap

    Flexible allowance for lunch and travel between visits. Choose a restaurant near your route. Check actual walking, transit or taxi times; no meal, fare or reservation is included.

  • 15:00120m
    corner Kitchener and Wellesley StsMap

    Suggested visit block; confirm current access, tickets, closures and the entrance before travelling. Approximate map pin from a community guide; confirm the entrance. Source: https://en.wikivoyage.org/wiki/Auckland/Central (revision 5421277). Selection and timing adapted from the credited guide; community route data retains CC BY-SA 4.0 attribution.

Day 2
  • 09:30120m
    Auckland Domain, ParnellMap

    Suggested visit block; confirm current access, tickets, closures and the entrance before travelling. Approximate map pin from a community guide; confirm the entrance. Source: https://en.wikivoyage.org/wiki/Auckland/Central (revision 5421277). Selection and timing adapted from the credited guide; community route data retains CC BY-SA 4.0 attribution.

  • 12:00150m
    AucklandMap

    Flexible allowance for lunch and travel between visits. Choose a restaurant near your route. Check actual walking, transit or taxi times; no meal, fare or reservation is included.

  • 15:00120m
    Park Rd, GraftonMap

    Suggested visit block; confirm current access, tickets, closures and the entrance before travelling. Approximate map pin from a community guide; confirm the entrance. Source: https://en.wikivoyage.org/wiki/Auckland/Central (revision 5421277). Selection and timing adapted from the credited guide; community route data retains CC BY-SA 4.0 attribution.

Day 3
  • 09:30120m
    250 Mt Eden Rd (vehicle entrance)Map

    Suggested visit block; confirm current access, tickets, closures and the entrance before travelling. Approximate map pin from a community guide; confirm the entrance. Source: https://en.wikivoyage.org/wiki/Auckland/Central (revision 5421277). Selection and timing adapted from the credited guide; community route data retains CC BY-SA 4.0 attribution.

  • 12:00150m
    AucklandMap

    Flexible allowance for lunch and travel between visits. Choose a restaurant near your route. Check actual walking, transit or taxi times; no meal, fare or reservation is included.

  • 15:00120m
    446 Parnell Rd, ParnellMap

    Suggested visit block; confirm current access, tickets, closures and the entrance before travelling. Approximate map pin from a community guide; confirm the entrance. Source: https://en.wikivoyage.org/wiki/Auckland/Central (revision 5421277). Selection and timing adapted from the credited guide; community route data retains CC BY-SA 4.0 attribution.

Day 4
  • 09:30120m
    Queens WharfMap

    Suggested visit block; confirm current access, tickets, closures and the entrance before travelling. Approximate map pin from a community guide; confirm the entrance. Source: https://en.wikivoyage.org/wiki/Auckland/Central (revision 5421277). Selection and timing adapted from the credited guide; community route data retains CC BY-SA 4.0 attribution.

  • 12:00150m
    AucklandMap

    Flexible allowance for lunch and travel between visits. Choose a restaurant near your route. Check actual walking, transit or taxi times; no meal, fare or reservation is included.

  • 15:00120m
    corner Quay and Hobson Sts, Viaduct HarbourMap

    Suggested visit block; confirm current access, tickets, closures and the entrance before travelling. Approximate map pin from a community guide; confirm the entrance. Source: https://en.wikivoyage.org/wiki/Auckland/Central (revision 5421277). Selection and timing adapted from the credited guide; community route data retains CC BY-SA 4.0 attribution.

Day 5
  • 09:30120m
    Great North Rd, Western SpringsMap

    Suggested visit block; confirm current access, tickets, closures and the entrance before travelling. Approximate map pin from a community guide; confirm the entrance. Source: https://en.wikivoyage.org/wiki/Auckland/Central (revision 5421277). Selection and timing adapted from the credited guide; community route data retains CC BY-SA 4.0 attribution.

  • 12:00150m
    AucklandMap

    Flexible allowance for lunch and travel between visits. Choose a restaurant near your route. Check actual walking, transit or taxi times; no meal, fare or reservation is included.

  • 15:00120m
    132 Hobson StMap

    Suggested visit block; confirm current access, tickets, closures and the entrance before travelling. Approximate map pin from a community guide; confirm the entrance. Source: https://en.wikivoyage.org/wiki/Auckland/Central (revision 5421277). Selection and timing adapted from the credited guide; community route data retains CC BY-SA 4.0 attribution.

Day 6
  • 08:00600m
    Auckland → RotoruaMap

    A full day reserved for travel and check-in, not a timetable or booking. Check train, flight, ferry or road options and door-to-door journey time before booking accommodation. Move the following day if your connection needs longer.

Day 7
  • 09:30120m
    RotoruaMap

    Suggested visit block; confirm current access, tickets, closures and the entrance before travelling. Approximate map pin from a community guide; confirm the entrance. Source: https://en.wikivoyage.org/wiki/Rotorua (revision 5416092). Selection and timing adapted from the credited guide; community route data retains CC BY-SA 4.0 attribution.

  • 12:00150m
    RotoruaMap

    Flexible allowance for lunch and travel between visits. Choose a restaurant near your route. Check actual walking, transit or taxi times; no meal, fare or reservation is included.

  • 15:00120m
    17 Tryon St, WhakarewarewaMap

    Suggested visit block; confirm current access, tickets, closures and the entrance before travelling. Approximate map pin from a community guide; confirm the entrance. Source: https://en.wikivoyage.org/wiki/Rotorua (revision 5416092). Selection and timing adapted from the credited guide; community route data retains CC BY-SA 4.0 attribution.

Day 8
  • 09:30120m
    Hemo Rd (SH 30)Map

    Suggested visit block; confirm current access, tickets, closures and the entrance before travelling. Approximate map pin from a community guide; confirm the entrance. Source: https://en.wikivoyage.org/wiki/Rotorua (revision 5416092). Selection and timing adapted from the credited guide; community route data retains CC BY-SA 4.0 attribution.

  • 12:00150m
    RotoruaMap

    Flexible allowance for lunch and travel between visits. Choose a restaurant near your route. Check actual walking, transit or taxi times; no meal, fare or reservation is included.

  • 15:00120m
    587 Waimangu RdMap

    Suggested visit block; confirm current access, tickets, closures and the entrance before travelling. Approximate map pin from a community guide; confirm the entrance. Source: https://en.wikivoyage.org/wiki/Rotorua (revision 5416092). Selection and timing adapted from the credited guide; community route data retains CC BY-SA 4.0 attribution.

Day 9
  • 09:30120m
    RotoruaMap

    Suggested visit block; confirm current access, tickets, closures and the entrance before travelling. Map pin unavailable; use the place name and address to locate the entrance. Source: https://en.wikivoyage.org/wiki/Rotorua (revision 5416092). Selection and timing adapted from the credited guide; community route data retains CC BY-SA 4.0 attribution.

  • 12:00150m
    RotoruaMap

    Flexible allowance for lunch and travel between visits. Choose a restaurant near your route. Check actual walking, transit or taxi times; no meal, fare or reservation is included.

  • 15:00120m
    201 Waiotapu Loop Rd, WaiotapuMap

    Suggested visit block; confirm current access, tickets, closures and the entrance before travelling. Approximate map pin from a community guide; confirm the entrance. Source: https://en.wikivoyage.org/wiki/Rotorua (revision 5416092). Selection and timing adapted from the credited guide; community route data retains CC BY-SA 4.0 attribution.

Day 10
  • 09:30120m
    1163 Eruera StMap

    Suggested visit block; confirm current access, tickets, closures and the entrance before travelling. Map pin unavailable; use the place name and address to locate the entrance. Source: https://en.wikivoyage.org/wiki/Rotorua (revision 5416092). Selection and timing adapted from the credited guide; community route data retains CC BY-SA 4.0 attribution.

  • 12:00150m
    RotoruaMap

    Flexible allowance for lunch and travel between visits. Choose a restaurant near your route. Check actual walking, transit or taxi times; no meal, fare or reservation is included.

  • 15:00120m
    1180 Tarawera RdMap

    Suggested visit block; confirm current access, tickets, closures and the entrance before travelling. Approximate map pin from a community guide; confirm the entrance. Source: https://en.wikivoyage.org/wiki/Rotorua (revision 5416092). Selection and timing adapted from the credited guide; community route data retains CC BY-SA 4.0 attribution.

Day 11
  • 09:30120m
    141 Western Rd, NgongotahāMap

    Suggested visit block; confirm current access, tickets, closures and the entrance before travelling. Approximate map pin from a community guide; confirm the entrance. Source: https://en.wikivoyage.org/wiki/Rotorua (revision 5416092). Selection and timing adapted from the credited guide; community route data retains CC BY-SA 4.0 attribution.

  • 12:00150m
    RotoruaMap

    Flexible allowance for lunch and travel between visits. Choose a restaurant near your route. Check actual walking, transit or taxi times; no meal, fare or reservation is included.

  • 15:00120m
    1335 Paradise Valley Road, NgongotahaMap

    Suggested visit block; confirm current access, tickets, closures and the entrance before travelling. Approximate map pin from a community guide; confirm the entrance. Source: https://en.wikivoyage.org/wiki/Rotorua (revision 5416092). Selection and timing adapted from the credited guide; community route data retains CC BY-SA 4.0 attribution.

Been to Auckland & Rotorua? Share your experience

What was worth it, what you'd skip, where you ate. Your tips help the next traveller plan this trip.

Share your experience

Keep planning your trip

Similar routes and the tools to finish your plan.

19Compare all 19 New Zealand itinerariesSee all routes 2 daysAuckland 2-Day ItineraryAuckland2 daysQueenstown 2-Day ItineraryQueenstown3 daysAuckland 3-Day ItineraryAuckland3 daysQueenstown 3-Day ItineraryQueenstown
Add this itinerary to your calendarEvery timed stop as an event in Google, Apple or Outlook Calendar.Download formats and instructionsPDF, Google Docs, Sheets, Excel and calendar, step by step.Build a realistic daily schedulePace each day with travel time, opening hours and breaks.

Frequently asked questions

Can I edit and download this itinerary?

Yes. It is free to edit any itinerary, start a blank one and download it as PDF, Google Docs, Google Sheets, Excel, CSV or a calendar file, with 20 free designs for PDFs and Google Docs. Pro ($5.99/month or $49.99/year (save 30%), or $9.99 once for a 30-day Trip Pass) unlocks every design for printable PDFs and Google Docs (100+) with unlimited downloads, an Excel planner with live formulas and charts, and a higher AI chat allowance.

Do I need to sign up to use this itinerary?

No sign-up is needed to browse, edit or use the AI chat. Downloading (PDF, Google Docs, Excel, Google Sheets, calendar, CSV or print) needs a free account (email link or Google, no credit card), which also keeps trips in My trips across devices; without one, trips are kept in your browser.

Are this itinerary's times and prices live?

No. Templates are drawn from official tourism boards and community travel guides and edited for pacing. Opening hours, prices and transport times are not live data: check them before you travel.

Does exporting to Google Docs or Google Sheets sync my changes?

No. Google Docs works through an editable .docx file in the same designs as the PDFs (20 free, the rest with Pro): upload it to Google Drive and open it with Google Docs. It also opens in Microsoft Word and Apple Pages. There is no live sync with Google. Google Sheets works by copy and paste: the itinerary is copied as a table that you paste into a new sheet. There is no live sync with Google.