Sign inGet Pro
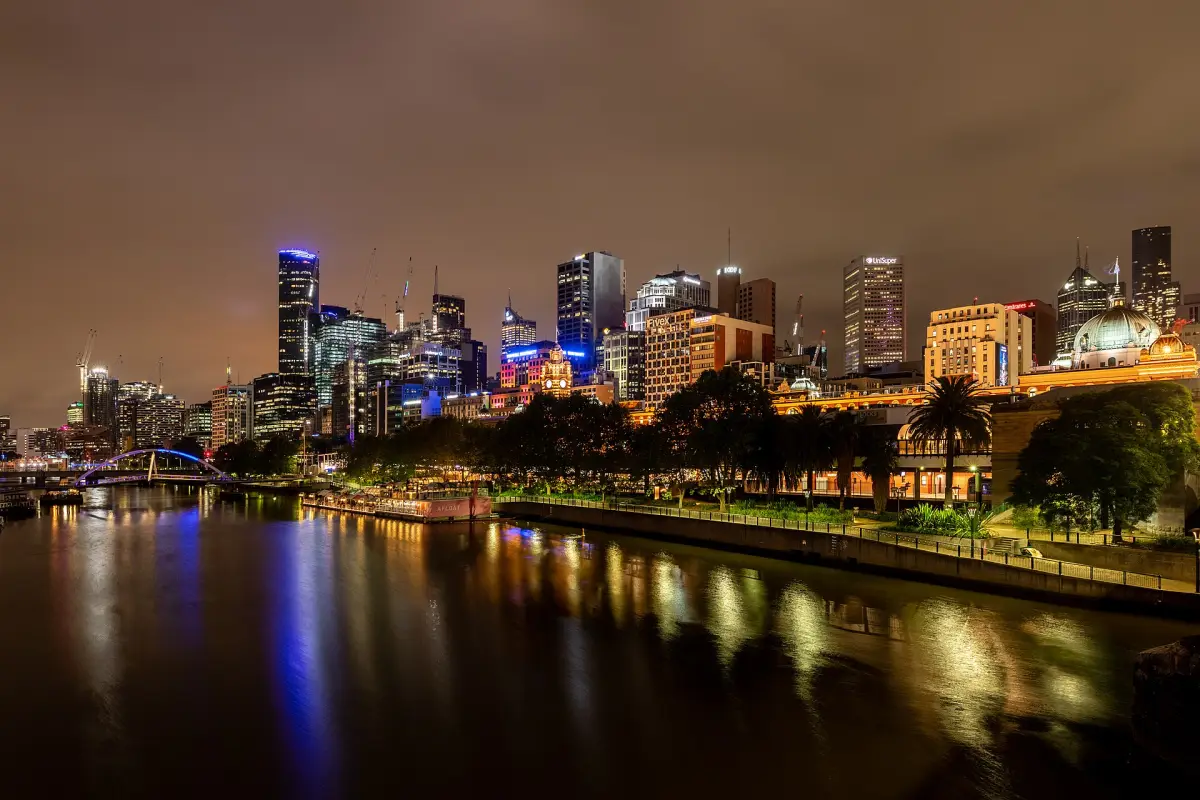
Melbourne (AU), Melbourne City Centre
Photo: Dietmar Rabich · CC BY-SA 4.0 · Wikimedia Commons
Destination template · 12 days

Melbourne & Adelaide in 12 days

2 sightseeing days in Melbourne, a dedicated relocation day, then 9 days in Adelaide. Includes Federation Square and The Adelaide Botanic Garden, with guide-listed dining suggestions.

Adapted from community travel guides · Researched Sources & notes

The stops are drawn from the guides below; daily order, times and durations are our suggested adaptation. Available map pins are approximate, not provider-verified; missing coordinates remain unset. Prices are left unknown; check tickets, opening hours and transport before booking.

Route data adapted from Wikivoyage contributors, with our own selection and suggested timing; shared under CC BY-SA 4.0. Source pages link to contributor histories. This is an editorial multi-day schedule; the source community has not rated this itinerary.

  • Stay in Melbourne for the first 2 sightseeing days; move to Adelaide on day 3, then stay for 9 sightseeing days. Book accommodation in both bases rather than returning each night.
  • The 661 km figure is approximate straight-line separation, not transit distance. The relocation day reserves room for travel and check-in without promising a direct service or a same-day connection. Verify the journey before booking this two-base plan.
  • City visits and restaurants are adapted from the linked retained community-guide material, not newly verified opening hours, live menus or first-hand visits. Suggested times are editable planning blocks. Check closures, reservations, accessibility and dietary needs.
  • Cover photo shows the first city. Original source and photo credits remain attached. Adapted community route selections retain CC BY-SA 4.0 attribution; source research dates remain in the individual stop and dining notes.
3 local dining picks added to this itineraryDining sources

These picks have positive travel-guide coverage or a named professional recommendation; they are not live customer ratings. Suggested times are not reservations. Confirm service days, dietary needs and prices. Other days remain open for your own food discoveries.

  • Day 1 · Rococo — Pizza, pasta. Community guide highlights this restaurant’s food or dining experience positively. Wikivoyage contributors ↗
  • Day 2 · Stokehouse — Restaurant meal; ask about house specialties. Community guide highlights this restaurant’s food or dining experience positively. Wikivoyage contributors ↗
  • Day 4 · Regent Thai — Curry. Community guide highlights this restaurant’s food or dining experience positively. Wikivoyage contributors ↗

Sources checked 2026-10-30. Community-guide dining data is adapted from Wikivoyage contributors under CC BY-SA 4.0; source pages link to contributor histories.

Melbourne & Adelaide itinerary: 12 days at a glance

Review the original daily plan before editing below. Times and durations are suggested planning blocks; dining stops are not reservations. Your personal edits appear in the editor and downloads.

Day 1: Melbourne: Federation Square & National Gallery of Victoria

  • · Federation Square · 120 min
  • · National Gallery of Victoria · 120 min
  • · Dinner: Rococo (Pizza, pasta) · 75 min

Day 2: Melbourne: Royal Botanic Gardens & Queen Victoria Market

  • · Royal Botanic Gardens · 120 min
  • · Queen Victoria Market · 120 min
  • · Dinner: Stokehouse (Restaurant meal; ask about house specialties) · 75 min

Day 3: Melbourne → Adelaide: travel and check-in

  • · Relocate: Melbourne → Adelaide · 600 min

Day 4: Adelaide: The Adelaide Botanic Garden & Art Gallery of South Australia

  • · The Adelaide Botanic Garden · 120 min
  • · Transfer to Art Gallery of South Australia · 30 min
  • · Art Gallery of South Australia · 120 min
  • · Dinner: Regent Thai (Curry) · 75 min

Day 5: Adelaide: South Australian Museum & Tandanya National Aboriginal Cultural Institute

  • · South Australian Museum · 120 min
  • · Transfer to Tandanya National Aboriginal Cultural Institute · 30 min
  • · Tandanya National Aboriginal Cultural Institute · 75 min

Day 6: Adelaide: National Railway Museum & South Australian Aviation Museum

  • · National Railway Museum · 120 min
  • · Transfer to South Australian Aviation Museum · 30 min
  • · South Australian Aviation Museum · 120 min

Day 7: Adelaide: Adelaide Zoo & National Wine Centre

  • · Adelaide Zoo · 120 min
  • · Transfer to National Wine Centre · 30 min
  • · National Wine Centre · 75 min

Day 8: Adelaide: Adelaide Holocaust Museum and Steiner Education Centre & Rundle Lantern light display

  • · Adelaide Holocaust Museum and Steiner Education Centre · 120 min
  • · Transfer to Rundle Lantern light display · 30 min
  • · Rundle Lantern light display · 75 min

Day 9: Adelaide: Fort Glanville Conservation Park & Hart's Mill Complex

  • · Fort Glanville Conservation Park · 120 min
  • · Transfer to Hart's Mill Complex · 30 min
  • · Hart's Mill Complex · 75 min

Day 10: Adelaide: Classic Jets Fighter Museum & Salisbury Waterwheel Museum

  • · Classic Jets Fighter Museum · 120 min
  • · Transfer to Salisbury Waterwheel Museum · 30 min
  • · Salisbury Waterwheel Museum · 120 min

Day 11: Adelaide: Tea Tree Gully Heritage Museum & Angove Conservation Park

  • · Tea Tree Gully Heritage Museum · 120 min
  • · Transfer to Angove Conservation Park · 30 min
  • · Angove Conservation Park · 120 min

Day 12: Adelaide: Cobbler Creek Recreation Park & National Military Vehicle Museum

  • · Cobbler Creek Recreation Park · 120 min
  • · Transfer to National Military Vehicle Museum · 45 min
  • · National Military Vehicle Museum · 120 min

Download this itinerary

Free · no sign-up
Customise right here: move, duplicate, add or delete days and activities, then download.
Day 1
  • 10:00120m
    Melbourne

    Suggested visit block; confirm opening hours, admission and transfer time. Map pin unavailable; locate the entrance before navigating. Source: Wikivoyage contributors, https://en.wikivoyage.org/wiki/Melbourne (CC BY-SA 4.0). Selection and timing adapted; route data shared under CC BY-SA 4.0.

  • 14:00120m
    Melbourne

    Suggested visit block; confirm opening hours, admission and transfer time. Map pin unavailable; locate the entrance before navigating. Source: Wikivoyage contributors, https://en.wikivoyage.org/wiki/Melbourne (CC BY-SA 4.0). Selection and timing adapted; route data shared under CC BY-SA 4.0.

  • 18:0075m
    Dining
    85/91 Acland St

    Pizza, pasta. Community guide highlights this restaurant’s food or dining experience positively. Suggested dining time, not a booking. Confirm service days, availability, dietary needs and current menu prices before travelling. Guide-listed service: 11AM-11PM. Recheck with the restaurant. Route distance is unknown; check travel time and the entrance. Approximate map pin; confirm the entrance. Dining source: Wikivoyage contributors, https://en.wikivoyage.org/wiki/Melbourne/St_Kilda (checked 2026-10-30). Guide recommendations are not live customer star ratings. Wikivoyage revision 5391326; selection and timing adapted under CC BY-SA 4.0.

Day 2
  • 10:00120m
    Melbourne

    Suggested visit block; confirm opening hours, admission and transfer time. Map pin unavailable; locate the entrance before navigating. Source: Wikivoyage contributors, https://en.wikivoyage.org/wiki/Melbourne (CC BY-SA 4.0). Selection and timing adapted; route data shared under CC BY-SA 4.0.

  • 14:00120m
    Melbourne

    Suggested visit block; confirm opening hours, admission and transfer time. Map pin unavailable; locate the entrance before navigating. Source: Wikivoyage contributors, https://en.wikivoyage.org/wiki/Melbourne (CC BY-SA 4.0). Selection and timing adapted; route data shared under CC BY-SA 4.0.

  • 18:0075m
    Dining
    30 Jacka Boulevard

    Restaurant meal; ask about house specialties. Community guide highlights this restaurant’s food or dining experience positively. Suggested dining time, not a booking. Confirm service days, availability, dietary needs and current menu prices before travelling. Guide-listed service: Midday-midnight. Recheck with the restaurant. Route distance is unknown; check travel time and the entrance. Approximate map pin; confirm the entrance. Dining source: Wikivoyage contributors, https://en.wikivoyage.org/wiki/Melbourne/St_Kilda (checked 2026-10-30). Guide recommendations are not live customer star ratings. Wikivoyage revision 5391326; selection and timing adapted under CC BY-SA 4.0.

Day 3
  • 08:00600m
    Melbourne → Adelaide

    Dedicated relocation day from Melbourne to Adelaide; no transport is booked. The city centres are approximately 661 km apart in a straight line, not a measured road or rail route. Choose and book a suitable flight, train, bus or ferry; confirm operating days, total door-to-door time, luggage rules and arrival before making reservations. This full-day block is reserved time, not a timetable. Move the following day if your journey needs longer.

Day 4
  • 09:30120m
    Adelaide

    Check weather and access conditions; arrange any required ferry or return transport separately. Approximate map pin; confirm the entrance. Source: Wikivoyage contributors, https://en.wikivoyage.org/wiki/Adelaide/City_and_North_Adelaide (CC BY-SA 4.0). Selection and timing adapted; route data shared under CC BY-SA 4.0.

  • 12:0030m
    Adelaide

    Estimated transfer allowance between visits (0.78 km straight-line distance, not road distance). Check walking, transit, ferry or taxi options before travelling; allow a meal break before the 15:00 visit.

  • 15:00120m
    North Terrace

    Check admission, timed-entry availability and the current exhibition or visitor route. Approximate map pin; confirm the entrance. Source: Wikivoyage contributors, https://en.wikivoyage.org/wiki/Adelaide/City_and_North_Adelaide (CC BY-SA 4.0). Selection and timing adapted; route data shared under CC BY-SA 4.0.

  • 18:0075m
    Dining
    165 O'Connell St

    Curry. Community guide highlights this restaurant’s food or dining experience positively. Suggested dining time, not a booking. Confirm service days, availability, dietary needs and current menu prices before travelling. Service hours need confirmation. About 2.1 km straight-line from the preceding stop; allow transit or taxi time as needed, not a measured walking route. Approximate map pin; confirm the entrance. Dining source: Wikivoyage contributors, https://en.wikivoyage.org/wiki/Adelaide/City_and_North_Adelaide (checked 2026-10-30). Guide recommendations are not live customer star ratings. Wikivoyage revision 5389253; selection and timing adapted under CC BY-SA 4.0.

Day 5
  • 09:30120m
    North Terrace

    Check admission, timed-entry availability and the current exhibition or visitor route. Approximate map pin; confirm the entrance. Source: Wikivoyage contributors, https://en.wikivoyage.org/wiki/Adelaide/City_and_North_Adelaide (CC BY-SA 4.0). Selection and timing adapted; route data shared under CC BY-SA 4.0.

  • 12:0030m
    Adelaide

    Estimated transfer allowance between visits (0.76 km straight-line distance, not road distance). Check walking, transit, ferry or taxi options before travelling; allow a meal break before the 15:00 visit.

  • 15:0075m
    253 Grenfell St

    Use this as a flexible sightseeing stop; check current visitor access before setting dates. Approximate map pin; confirm the entrance. Source: Wikivoyage contributors, https://en.wikivoyage.org/wiki/Adelaide/City_and_North_Adelaide (CC BY-SA 4.0). Selection and timing adapted; route data shared under CC BY-SA 4.0.

Day 6
  • 09:30120m
    76 Lipson St

    Check admission, timed-entry availability and the current exhibition or visitor route. Approximate map pin; confirm the entrance. Source: Wikivoyage contributors, https://en.wikivoyage.org/wiki/Adelaide/Port_Adelaide%2C_Enfield%2C_Prospect_and_Outer_Harbor (CC BY-SA 4.0). Selection and timing adapted; route data shared under CC BY-SA 4.0.

  • 12:0030m
    Adelaide

    Estimated transfer allowance between visits (0.35 km straight-line distance, not road distance). Check walking, transit, ferry or taxi options before travelling; allow a meal break before the 15:00 visit.

  • 15:00120m
    66 Lipson St

    Check admission, timed-entry availability and the current exhibition or visitor route. Approximate map pin; confirm the entrance. Source: Wikivoyage contributors, https://en.wikivoyage.org/wiki/Adelaide/Port_Adelaide%2C_Enfield%2C_Prospect_and_Outer_Harbor (CC BY-SA 4.0). Selection and timing adapted; route data shared under CC BY-SA 4.0.

Day 7
  • 09:30120m
    Frome Road

    Check admission, timed-entry availability and the current exhibition or visitor route. Approximate map pin; confirm the entrance. Source: Wikivoyage contributors, https://en.wikivoyage.org/wiki/Adelaide/City_and_North_Adelaide (CC BY-SA 4.0). Selection and timing adapted; route data shared under CC BY-SA 4.0.

  • 12:0030m
    Adelaide

    Estimated transfer allowance between visits (1.03 km straight-line distance, not road distance). Check walking, transit, ferry or taxi options before travelling; allow a meal break before the 15:00 visit.

  • 15:0075m
    cnr of Botanic and Hackney Rd, Hackney

    Use this as a flexible sightseeing stop; check current visitor access before setting dates. Approximate map pin; confirm the entrance. Source: Wikivoyage contributors, https://en.wikivoyage.org/wiki/Adelaide/City_and_North_Adelaide (CC BY-SA 4.0). Selection and timing adapted; route data shared under CC BY-SA 4.0.

Day 8
  • 09:30120m
    33 Wakefield Street

    Check admission, timed-entry availability and the current exhibition or visitor route. Approximate map pin; confirm the entrance. Source: Wikivoyage contributors, https://en.wikivoyage.org/wiki/Adelaide/City_and_North_Adelaide (CC BY-SA 4.0). Selection and timing adapted; route data shared under CC BY-SA 4.0.

  • 12:0030m
    Adelaide

    Estimated transfer allowance between visits (0.67 km straight-line distance, not road distance). Check walking, transit, ferry or taxi options before travelling; allow a meal break before the 15:00 visit.

  • 15:0075m
    Cnr Rundle St and Pulteney St

    Use this as a flexible sightseeing stop; check current visitor access before setting dates. Approximate map pin; confirm the entrance. Source: Wikivoyage contributors, https://en.wikivoyage.org/wiki/Adelaide/City_and_North_Adelaide (CC BY-SA 4.0). Selection and timing adapted; route data shared under CC BY-SA 4.0.

Day 9
  • 09:30120m
    Adelaide

    Check weather and access conditions; arrange any required ferry or return transport separately. Approximate map pin; confirm the entrance. Source: Wikivoyage contributors, https://en.wikivoyage.org/wiki/Adelaide/Port_Adelaide%2C_Enfield%2C_Prospect_and_Outer_Harbor (CC BY-SA 4.0). Selection and timing adapted; route data shared under CC BY-SA 4.0.

  • 12:0030m
    Adelaide

    Estimated transfer allowance between visits (2.14 km straight-line distance, not road distance). Check walking, transit, ferry or taxi options before travelling; allow a meal break before the 15:00 visit.

  • 15:0075m
    Mundy St, Port Adelaide

    Use this as a flexible sightseeing stop; check current visitor access before setting dates. Approximate map pin; confirm the entrance. Source: Wikivoyage contributors, https://en.wikivoyage.org/wiki/Adelaide/Port_Adelaide%2C_Enfield%2C_Prospect_and_Outer_Harbor (CC BY-SA 4.0). Selection and timing adapted; route data shared under CC BY-SA 4.0.

Day 10
  • 09:30120m
    Parafield Airport, 107 Anderson Dr, Parafield

    Check admission, timed-entry availability and the current exhibition or visitor route. Approximate map pin; confirm the entrance. Source: Wikivoyage contributors, https://en.wikivoyage.org/wiki/Adelaide/Salisbury%2C_Playford_and_Tea_Tree_Gully (CC BY-SA 4.0). Selection and timing adapted; route data shared under CC BY-SA 4.0.

  • 12:0030m
    Adelaide

    Estimated transfer allowance between visits (3.4 km straight-line distance, not road distance). Check walking, transit, ferry or taxi options before travelling; allow a meal break before the 15:00 visit.

  • 15:00120m
    Commercial Road, Salisbury

    Check admission, timed-entry availability and the current exhibition or visitor route. Approximate map pin; confirm the entrance. Source: Wikivoyage contributors, https://en.wikivoyage.org/wiki/Adelaide/Salisbury%2C_Playford_and_Tea_Tree_Gully (CC BY-SA 4.0). Selection and timing adapted; route data shared under CC BY-SA 4.0.

Day 11
  • 09:30120m
    3 Perseverance Rd, Tea Tree Gully

    Check admission, timed-entry availability and the current exhibition or visitor route. Approximate map pin; confirm the entrance. Source: Wikivoyage contributors, https://en.wikivoyage.org/wiki/Adelaide/Salisbury%2C_Playford_and_Tea_Tree_Gully (CC BY-SA 4.0). Selection and timing adapted; route data shared under CC BY-SA 4.0.

  • 12:0030m
    Adelaide

    Estimated transfer allowance between visits (0.74 km straight-line distance, not road distance). Check walking, transit, ferry or taxi options before travelling; allow a meal break before the 15:00 visit.

  • 15:00120m
    Tea Tree Gully

    Check weather and access conditions; arrange any required ferry or return transport separately. Approximate map pin; confirm the entrance. Source: Wikivoyage contributors, https://en.wikivoyage.org/wiki/Adelaide/Salisbury%2C_Playford_and_Tea_Tree_Gully (CC BY-SA 4.0). Selection and timing adapted; route data shared under CC BY-SA 4.0.

Day 12
  • 09:30120m
    Adelaide

    Check weather and access conditions; arrange any required ferry or return transport separately. Approximate map pin; confirm the entrance. Source: Wikivoyage contributors, https://en.wikivoyage.org/wiki/Adelaide/Salisbury%2C_Playford_and_Tea_Tree_Gully (CC BY-SA 4.0). Selection and timing adapted; route data shared under CC BY-SA 4.0.

  • 12:0045m
    Adelaide

    Estimated transfer allowance between visits (7.79 km straight-line distance, not road distance). Check walking, transit, ferry or taxi options before travelling; allow a meal break before the 15:00 visit.

  • 15:00120m
    Adelaide

    Check admission, timed-entry availability and the current exhibition or visitor route. Approximate map pin; confirm the entrance. Source: Wikivoyage contributors, https://en.wikivoyage.org/wiki/Adelaide/Salisbury%2C_Playford_and_Tea_Tree_Gully (CC BY-SA 4.0). Selection and timing adapted; route data shared under CC BY-SA 4.0.

Been to Melbourne & Adelaide? Share your experience

What was worth it, what you'd skip, where you ate. Your tips help the next traveller plan this trip.

Share your experience

Keep planning your trip